Nailart for funn!

A blog about nailart, creativity and life in general! :)


4 Comments

Day 2 Pre-Spring Challenge Contest Pink

1

For day two the theme is pink and I decided to keep it simple and use my fav pink ever which is OPI’s Strawberry Margarita. I stamped gold Konad stamping polish over it. I used BM-315. I really love the paisley print. It was really difficult to capture the color because it is so light and shimmery. It’s a very subtle look, you really need the light to catch the stamping polish. But I really love it!2


5 Comments

Bridal Manicure

1A

Next year on August first I am getting married! (yay!) 🙂 So, I’ve been thinking about what kind of manicure I should have for my wedding day. I’m still not sure what I want so I’m just experimenting with lots of different looks and styles. I’m pretty sure I will eventually decide on something really simple and elegant. When I googled bridal manicures I really didn’t like what I saw. I definitely don’t want a Kardashian inspired look!

This look is really simple. I used a Konad stamping plate m56. I wanted a nice delicate french manicure look. I like the lace effect, it’s pretty.

So, there will be many more bridal manicures over the next few months as I play around with different looks.  I’d appreciate any advice from nail art bloggers! What manicure did you rock on your wedding day? 1B 1C


Leave a comment

Snowflake Manicure

1

This is a subtle Christmas manicure. The snowflakes look great when the light hits them.

I used Konad stamping plate m59 and silver and gold Konad stamping polish. The green is Sally Hansen Xtreme wear and the red is OPI’s Color So Hot It Berns.  I really love how the snowflakes turned out. My nails remind me of wrapping paper! 🙂

I’m sure i’ll be seeing lots of Christmas themed manicures this month 🙂 Can’t wait!!! I know I will be trying a few myself. 23


6 Comments

Blue Flowers

This is a quick and simple stamping manicure. I previously made a tutorial on stamping. You can check it out here

I used Konad plate m56 and dark blue Konad stamping polish. The base coat is a brand called Eclipse. It’s made in Korea. It cost 1,000 Korean Won. That’s around 90 cents US. I fully expected it to be bad quality. It wasn’t. I love finding bargains like that! I literally fished it out of a huge bin of nail polishes all for that price. 🙂

This manicure isn’t the best. I am still new to stamping. But I plan to do a lot more and get better. 🙂 So bear with me 🙂


Leave a comment

Starry Starry Night

More stamping!

This look was inspired by a top I own.

I wanted my nails to match it. I normally don’t do that but this time I did! Here’s what I used for this manicure.

The base coat is Etude House (Korean brand) the white is Konad stamping polish and I finished it with OPI topcoat.  Also, I used some nail art stones!

And here’s the manicure!


6 Comments

Nail Stamp Tutorial

I have not been stamping very long but I love the amazing results you can get from a simple stamp! The possibilities for new and different manicures are endless. A perk is with the stamp it doesn’t matter if your hand slightly shakes but with freestyle nail art that’s a big issue.  I learned how to nail stamp from a tutorial. So here is my own version  on how to nail stamp.

First, here is what you will need. A stamping plate (I am using a Konad plate) Konad are a really good brand. You also need a rubber stamp,  a scraper or a plastic card (it can be an old gift card etc) and I use Konad nail polish that is especially made for stamping. This polish is much more opaque than other so it stamps well. However, I have been told that if you want to use regular nail polish for stamping you just file the rubber stamp a few times to make it less smooth.

First paint your nails a base color. I used OPI Margarita.

Then paint lightly over the stamp design.

Then roll the stamp over the plate in one smooth motion.

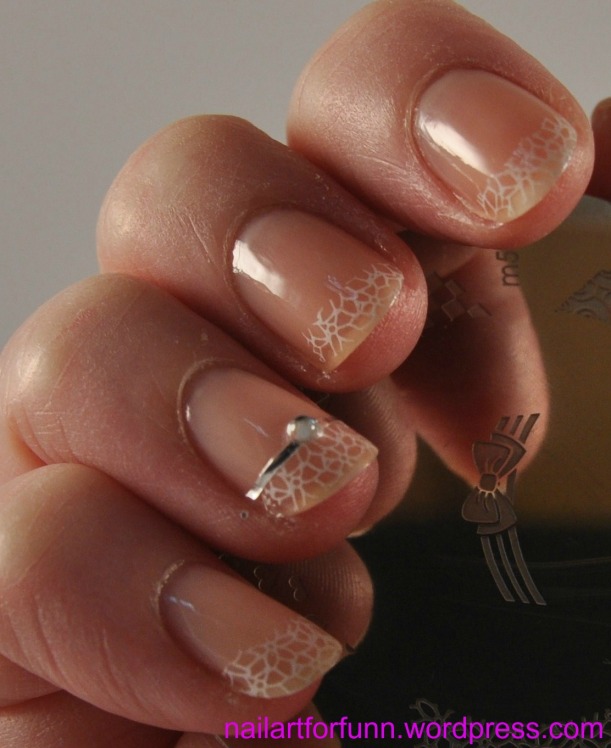
Stamp on the nail using the same smooth left to right or right to left motion.

Allow it to dry, (won’t take long) and cover with a topcoat! I use OPI Top Coat.

Please let me know what you think about this  tutorial. It’s my first!!!